
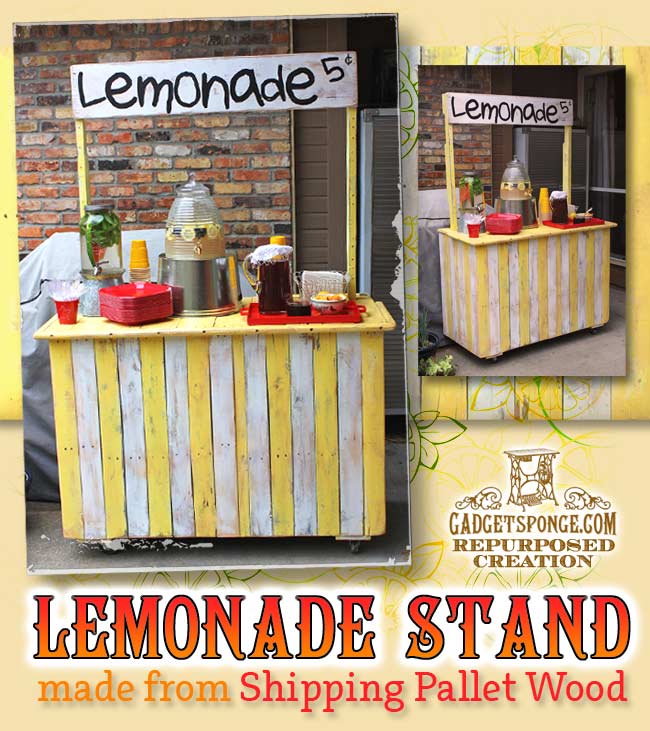
Lemonade Stand: Made from recycled pallet wood
A little while back my wife ran across a blog she was surfing by the name of LilLuna.com. Krysten and her husband put together a vintage style lemonade stand. You can see their lemonade stand (HERE). My wife and I had our son's fifth birthday party coming up and she thought it would be great to have one for that and for future uses. Well, you know the rest of the story. Husband builds said lemonade stand because "If momma ain't happy, nobody's happy." I wanted to use different colors, but truth is, yellow and white are by far the best colors for this project.
I DID had a great time building it. It is made completely of wood my oldest son and I broke up from shipping pallets. The signboard up top was from some old wood I found curbside. And the shelf I built into the bottom of it on the backside was a large board from a piano that I dismantled several months ago.
 Busting up old shipping pallets can be quite the chore without the proper tools. I now have a GREAT tool for this exact purpose called a "Pallet Reclamation Bar", but I'll get into that fine product a little later on. The boards around the perimeter were just standard boards that had the same width from several pallets. The boards on the top surface were larger boards that were all uniform size from one larger pallet. I trimmed off the extra length of each board with a circular saw once they were all nailed to the exterior structure.
 The inside structure was built using the three center boards of the pallets. The lengths of the stand are the length of a pallet support board. I cut one in half to create the depth on each end. That made the square for the top and I did the same for the bottom. I then used some more of those boards to connect each square frame vertically. At that point, I had my frame to start slapping the boards on. From that point it was just cutting off extra length of boards, sanding and painting.
 One of my new best friends is Kilz brand spray paint (odorless). It dries like powder and is easy to sand back down to a desired effect. I sprayed the whole stand in the Kilz white spray paint first. I then masked off the parts that I wanted to spray paint yellow. After sanding the whole stand to the desired effect, I then did some aging to the boards to give it a little grit and age. The sanding was a breeze with the powdery texture of the Kilz spray paint. A couple of layers of spray polyurethane on the top gave the surface some protection from future scratches. I had some stout casters that I mounted on a support board across both ends. The casters were left over from a storage shelf structure that I used permanent screw-in bolt/feet for instead of the supplied casters. The only purchase made in this project was the Kilz spray paint and the yellow spray paint. Everything else I already had on hand!
The quick vinyl letters that my wife cut out make a quick sign out of the top that can be taken off and a new one for a different event can serve the next get together. This would make a fun weekend project for sure!