
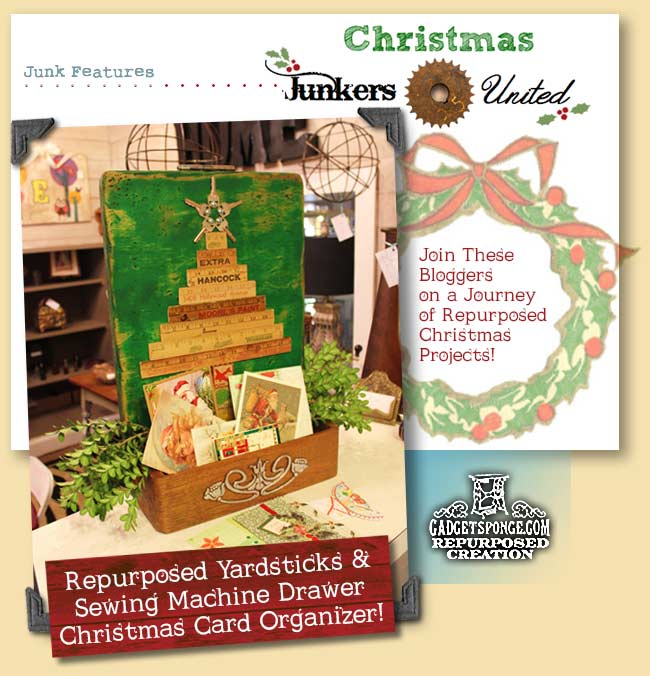
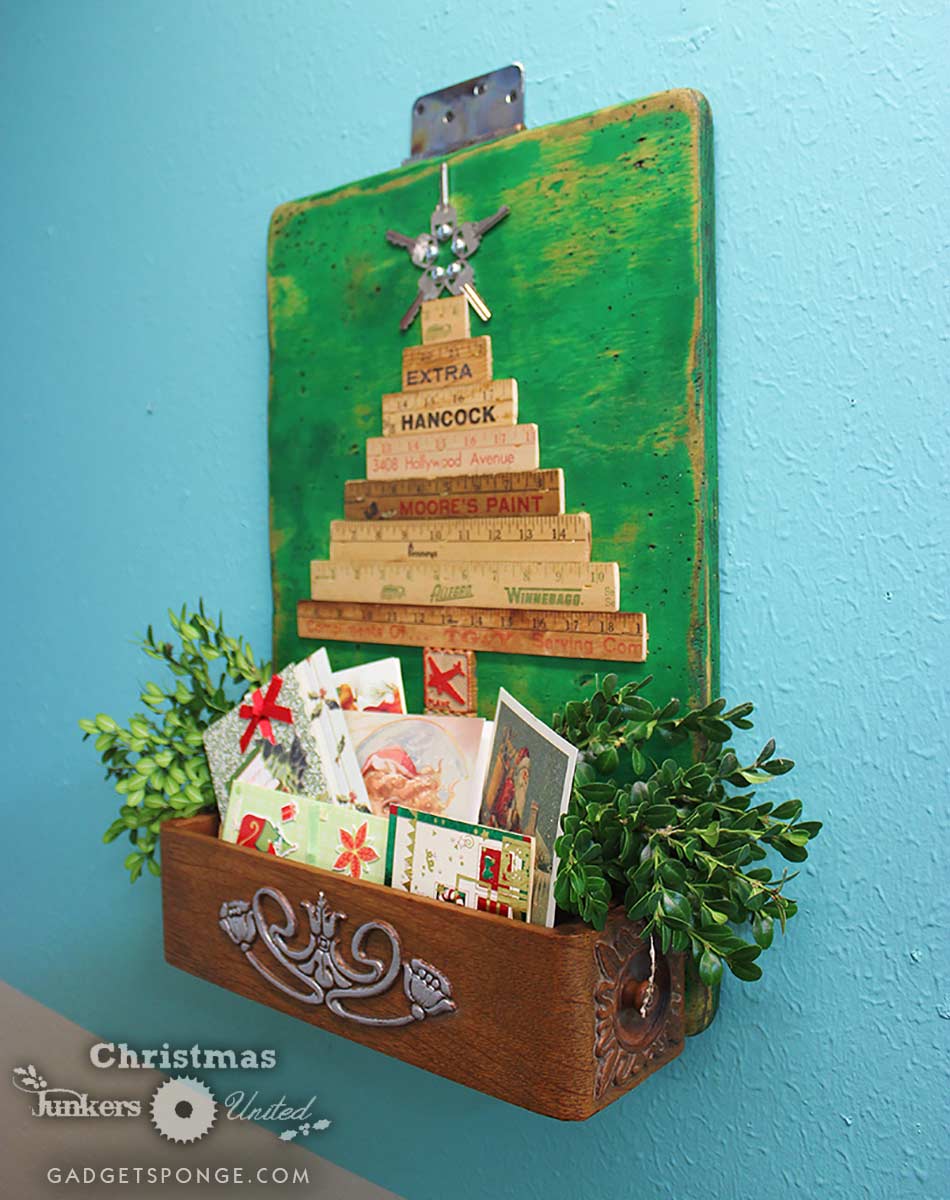
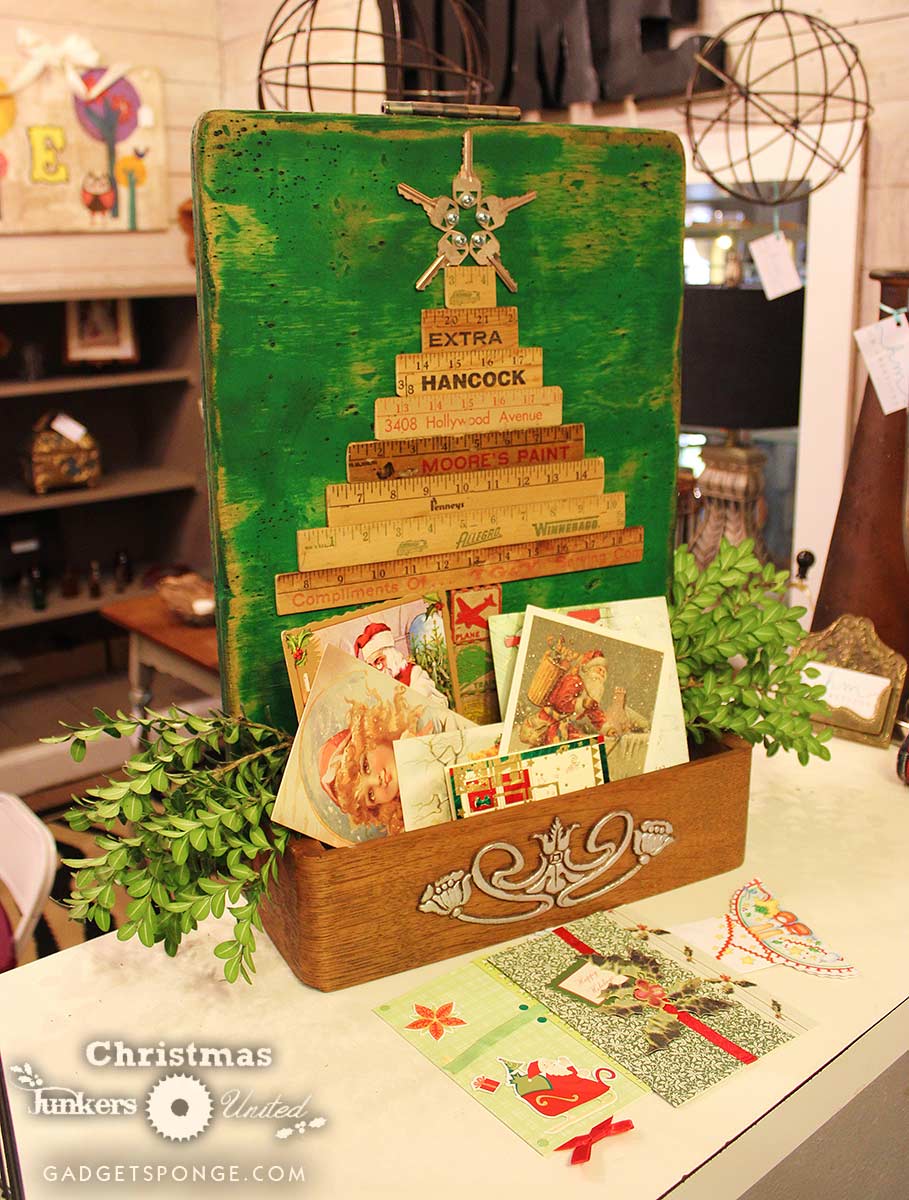
2014 Christmas Junkers United Repurposed Yardstick & Sewing Machine Drawer Christmas Card Organizer
Hey folks! Have I got a surprise for you! You're about to begin a journey through 15 different, amazing blogs celebrating repurposed Christmas-themed creations! If you're new to GadgetSponge, you can sign your email up on the lefthand side over there or you can follow on Facebook, Twitter, Pinterest or Instagram.
First, I'll give you a tease about my particular project right.....about.....NOW!...
I decided, as my part in the presentation, to create a repurposed Christmas card holder using vintage yardsticks, old keys, and an antique sewing machine drawer. I'll show you my progress pictures in just a second so you'll see how I did it step by step!

So, you are in for a treat with all 15 of the awesome blogs participating bringing you original, repurposed and/or upcycled creations just in time for the holidays. And each one showing you how to reproduce it for your own household. After my tutorial, I'll present you a list of the other contributors so you can hop over to their blogs and see what they produced. So one with the DIY! Let's Go!....
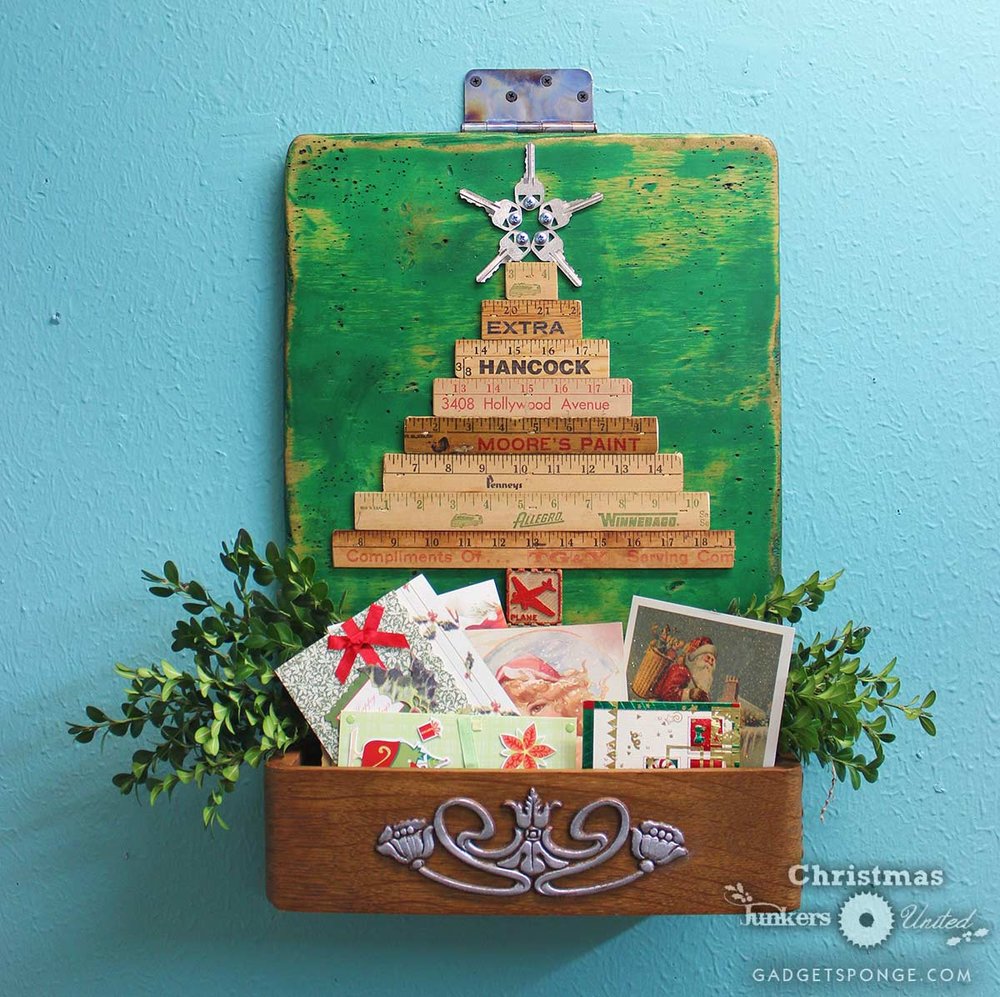
Here's the final creation. Now let's go through it step by step.
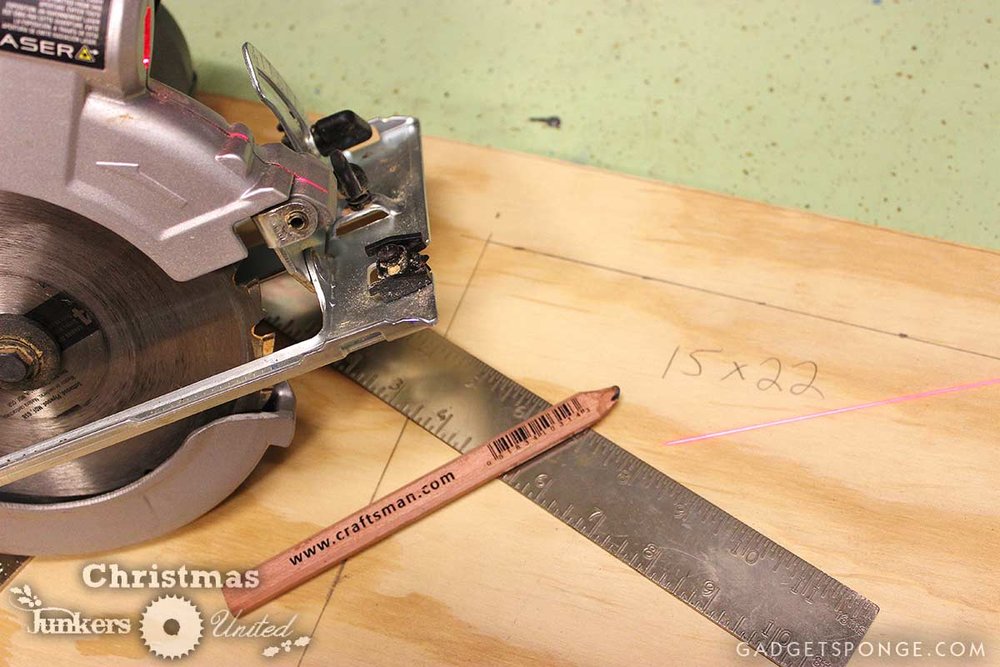
I first measured up my plywood piece and cut it out. I've made a few of these and I've found that 15" wide by 22" tall works great for this design. You can also sometimes use the wood board off of the top of an antique sewing machine that covers the sewing machine. It's just about the same size in most cases. Just another way to repurpose parts from the sewing machine structure!
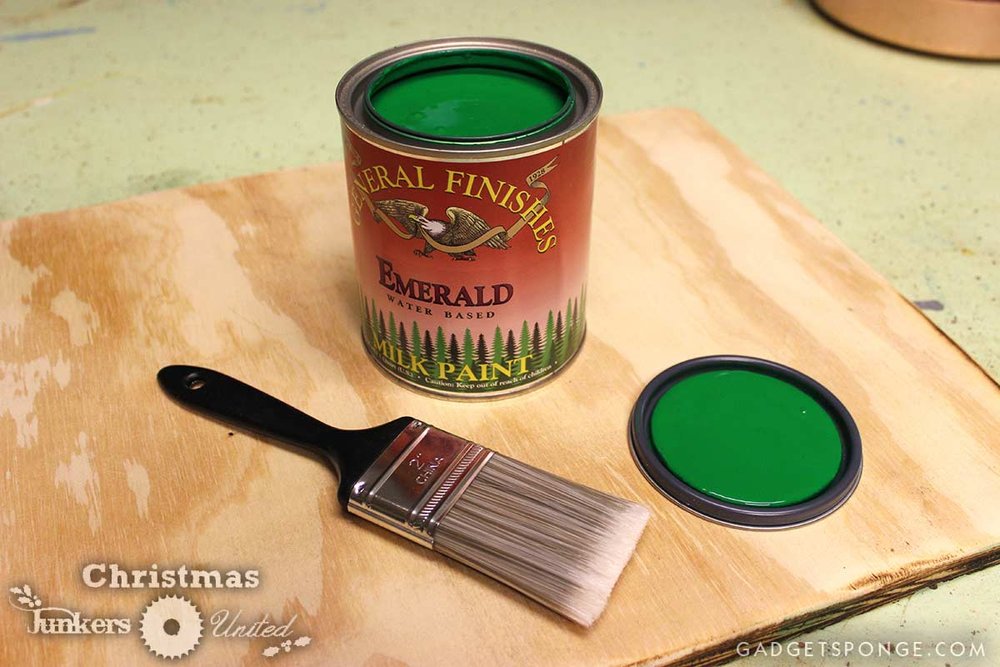
After cutting the wood and sanding the edges, I grabbed my preferred paint by General Finishes. It's a milk paint and I really enjoy using it. I gave the sides and front two coats.

I did some distressing of the wood after the paint dried. The next step is to either seal it with clear coat or some aging wax. I prefer Annie Sloan's dark wax to really get into the pits and bring out the warm tones of the wood and paint.

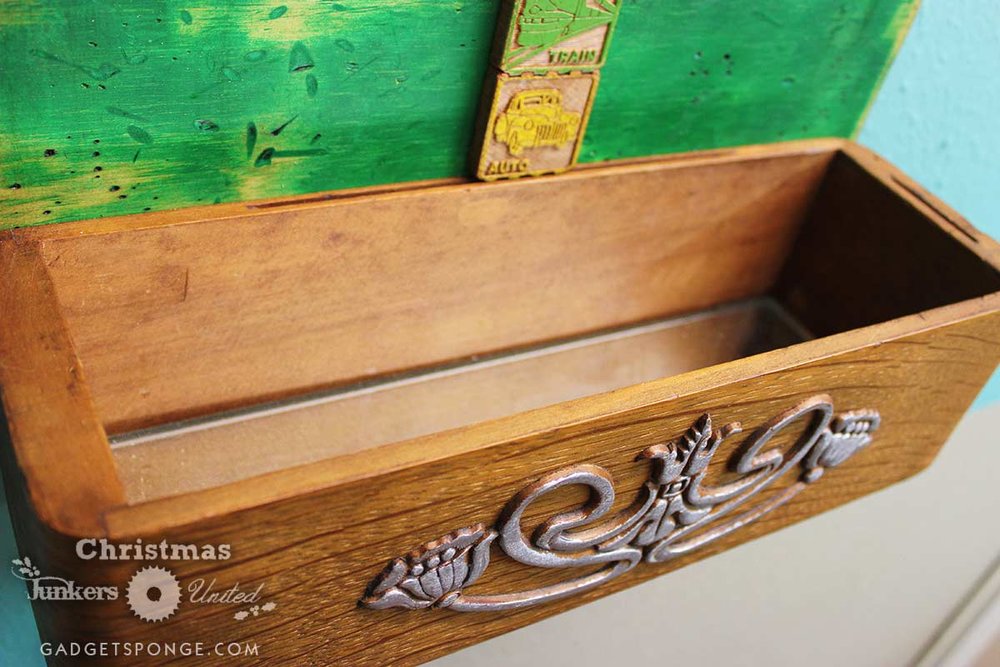
I wanted the nice detail work on the front of the antique sewing machine drawer to really stand out so I decided to use some Modern Masters metallic silver paint. I dabbed it on lightly with a shop rag so it would only touch the top of the relief work and not the surface of the drawer.
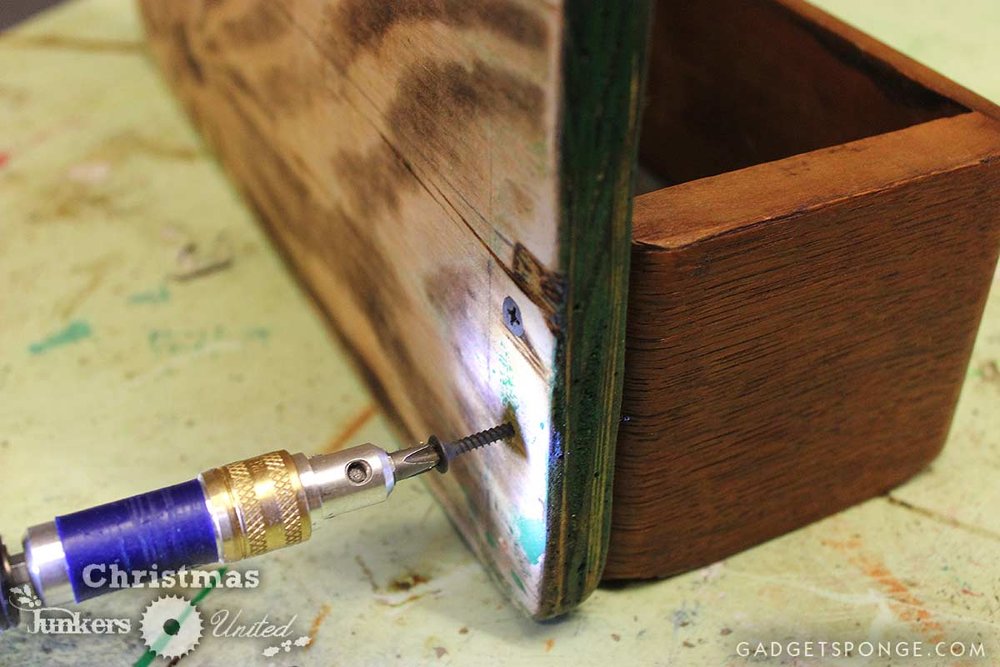
The drawer needs to have a good bond with the back board piece so I lined them up together and pre-drilled holes and screwed them together for a solid connection.
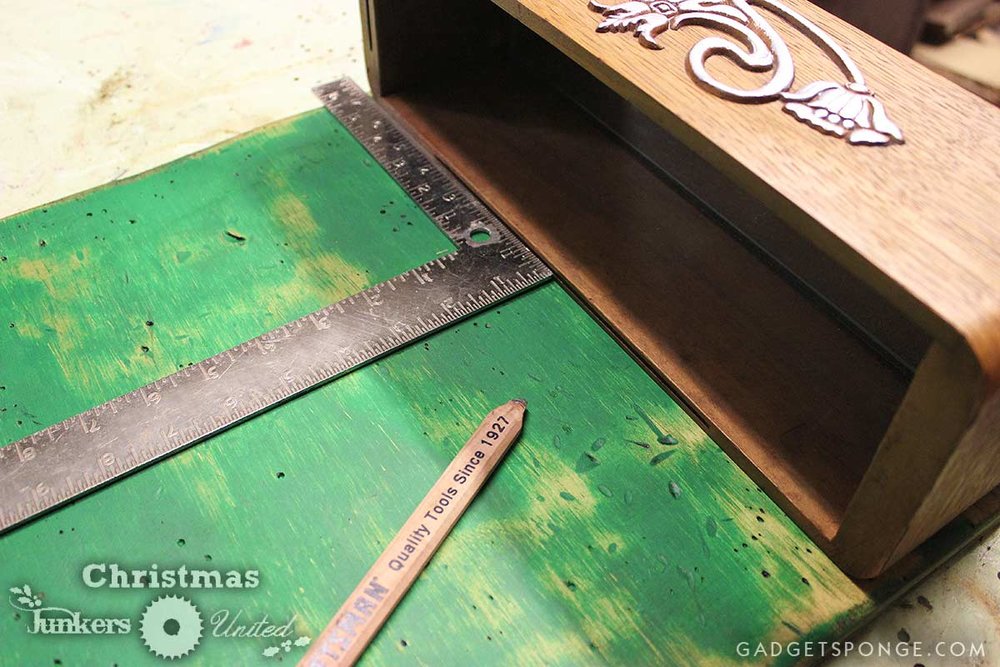
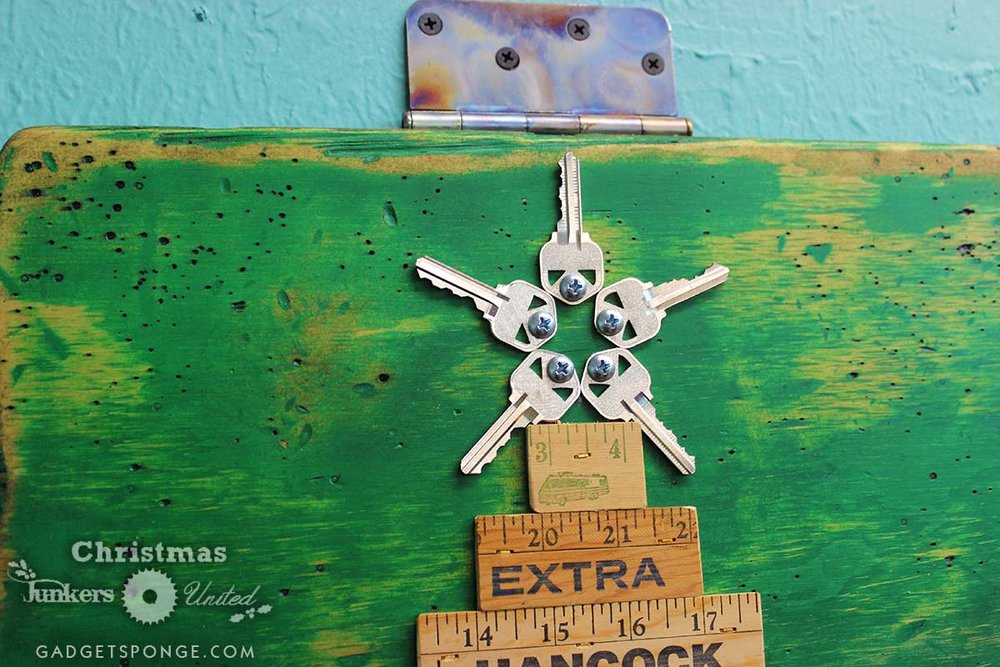
The vintage yardstick and key Christmas tree is the next step. Find your center and make a faint line up the middle as your guide for lining up the alphabet blocks, the yardsticks, and the keys at the top.

I decided to have some fun and play off the "Planes, Trains, and Automobiles" reference. The vintage designs on these blocks are unrivaled.
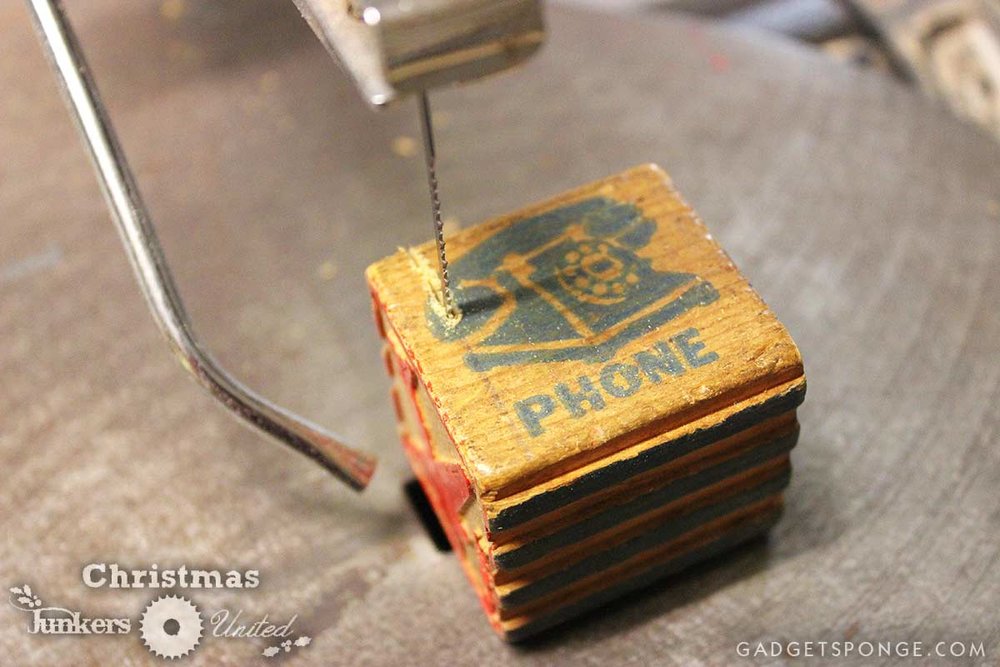
I wanted the thickness of the blocks to match that of the yardsticks. So I used a scroll saw to carefully cut the tops off.
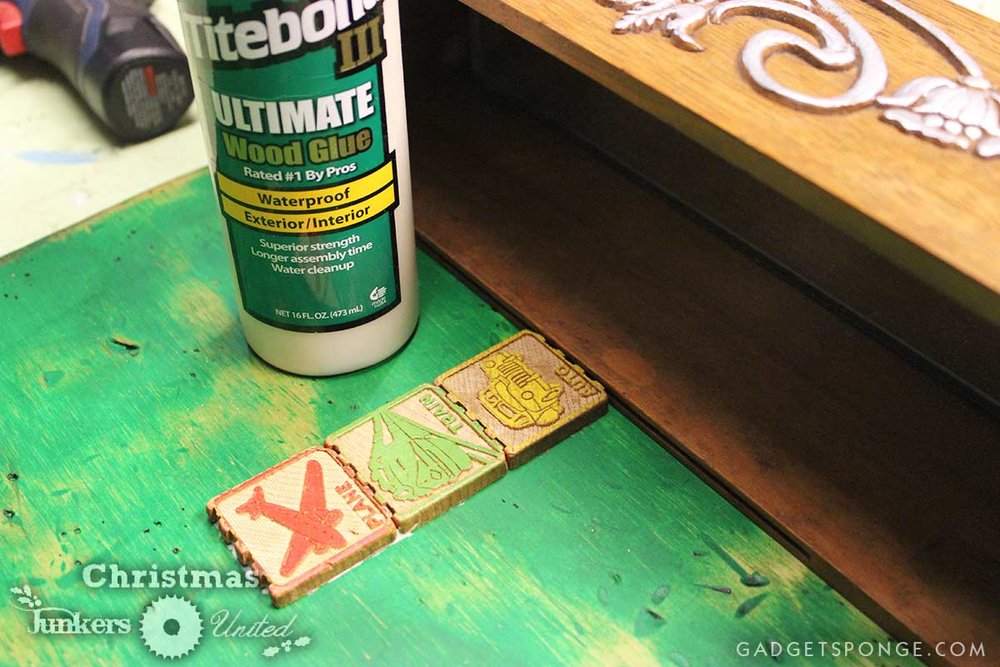
It's time to put glue to the board! Carefully apply just enough glue to squish under the blocks. Remember to line up with your center mark.

For the yardstick Christmas tree, you'll want to use as good of a variety as you can to build the diversity in tones of the wood. You can also use colored/painted yardsticks. Cut your yardsticks in a repeated shortening distance to give the staggered triangle shape of a tree.
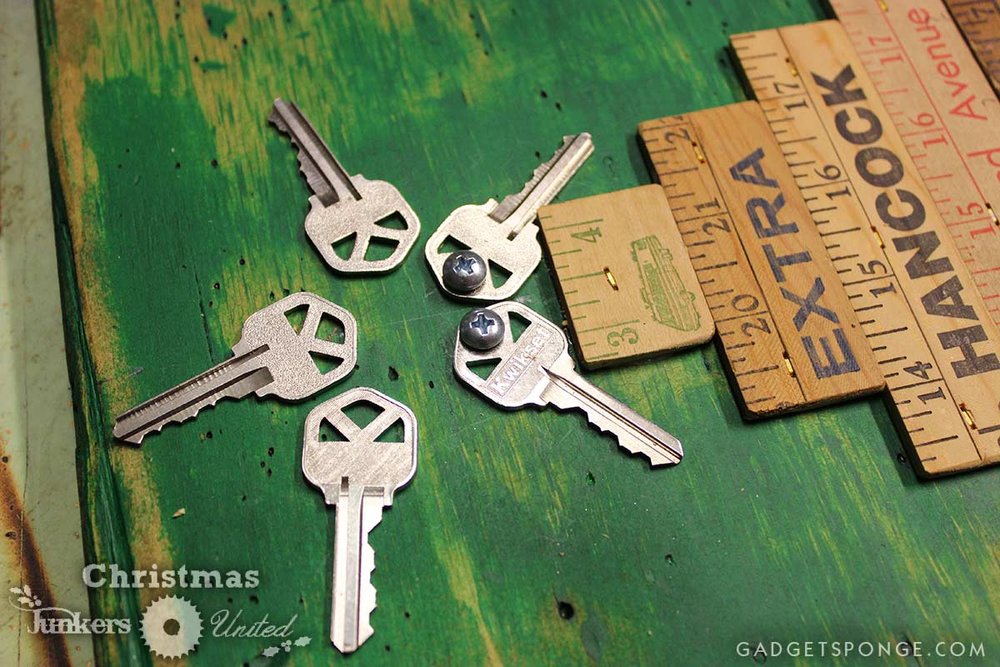
Grab about five keys to create the star pattern. I find it best to use whatever has the most contrast against your wood backboard. I decided to use bright, silver keys to really pop. The easiest way to start the pattern is to align the bottom two keys on both sides of your center line. Then you can align the other three and space them for a great star pattern.
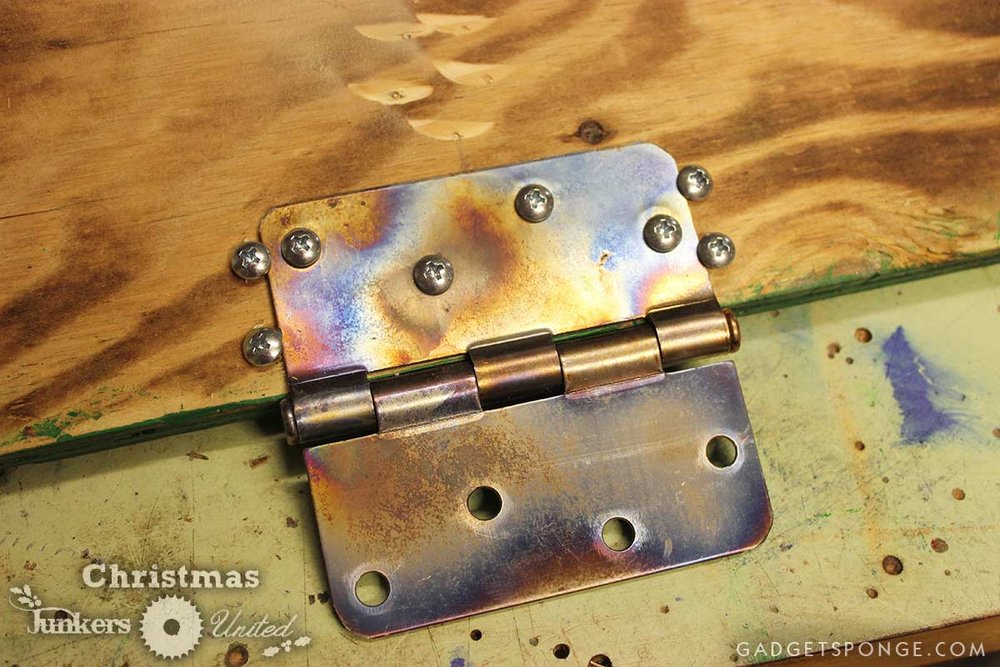
The final step is to decide how you want have your Christmas card organizer mount to a wall. I like to allow the hinge(s) to show which also allows a more flush mounting to the wall. Others might prefer to mount the organizer much like a framed painting or photo with wire or a nail mount with teeth.
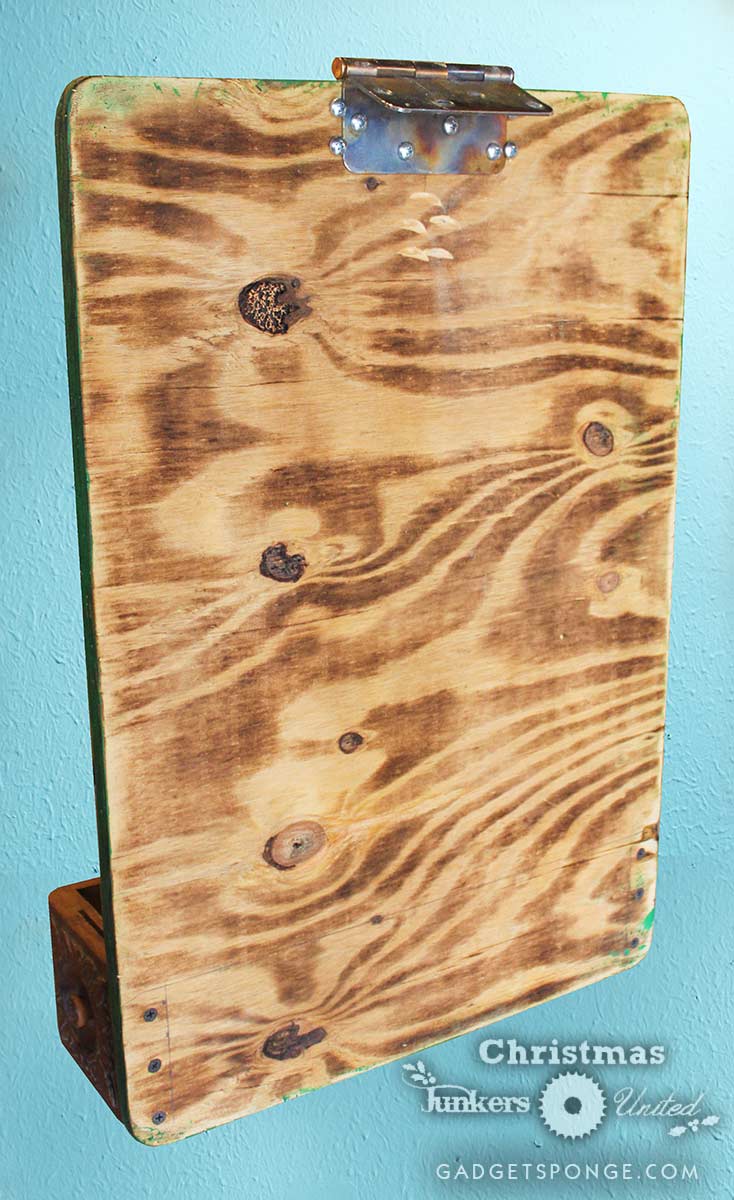
And lastly I decided to torch the back of the piece to give it some more character. I sanded it afterwards so that there was no burnt residue left.
NOW --- Let's see the finished project!...


Now, how about checking out the other great bloggers that are participating in this great, holiday promotion!?! Click on any and all of the links below to visit their blogs and see what they are up to: